It’s an experience every designer dreads. You’ve worked hard to get each color on your poster just perfect to match your main art element, to make your poster jump out from the madding crowd of images facing your audience. You’re excited to see your creation in its printed form.
But when the printer brings it out from the back room, it’s all wrong. The colors aren’t vibrant. The blue in your background has nothing to do with the blue in the star’s dress. You want to scream, and the printer looks at you with the puzzled look: “What’s wrong? This is what you sent us.”
You can avoid this frustrating situation by following the 10 simple suggestions in this designer’s guide to printing a poster:
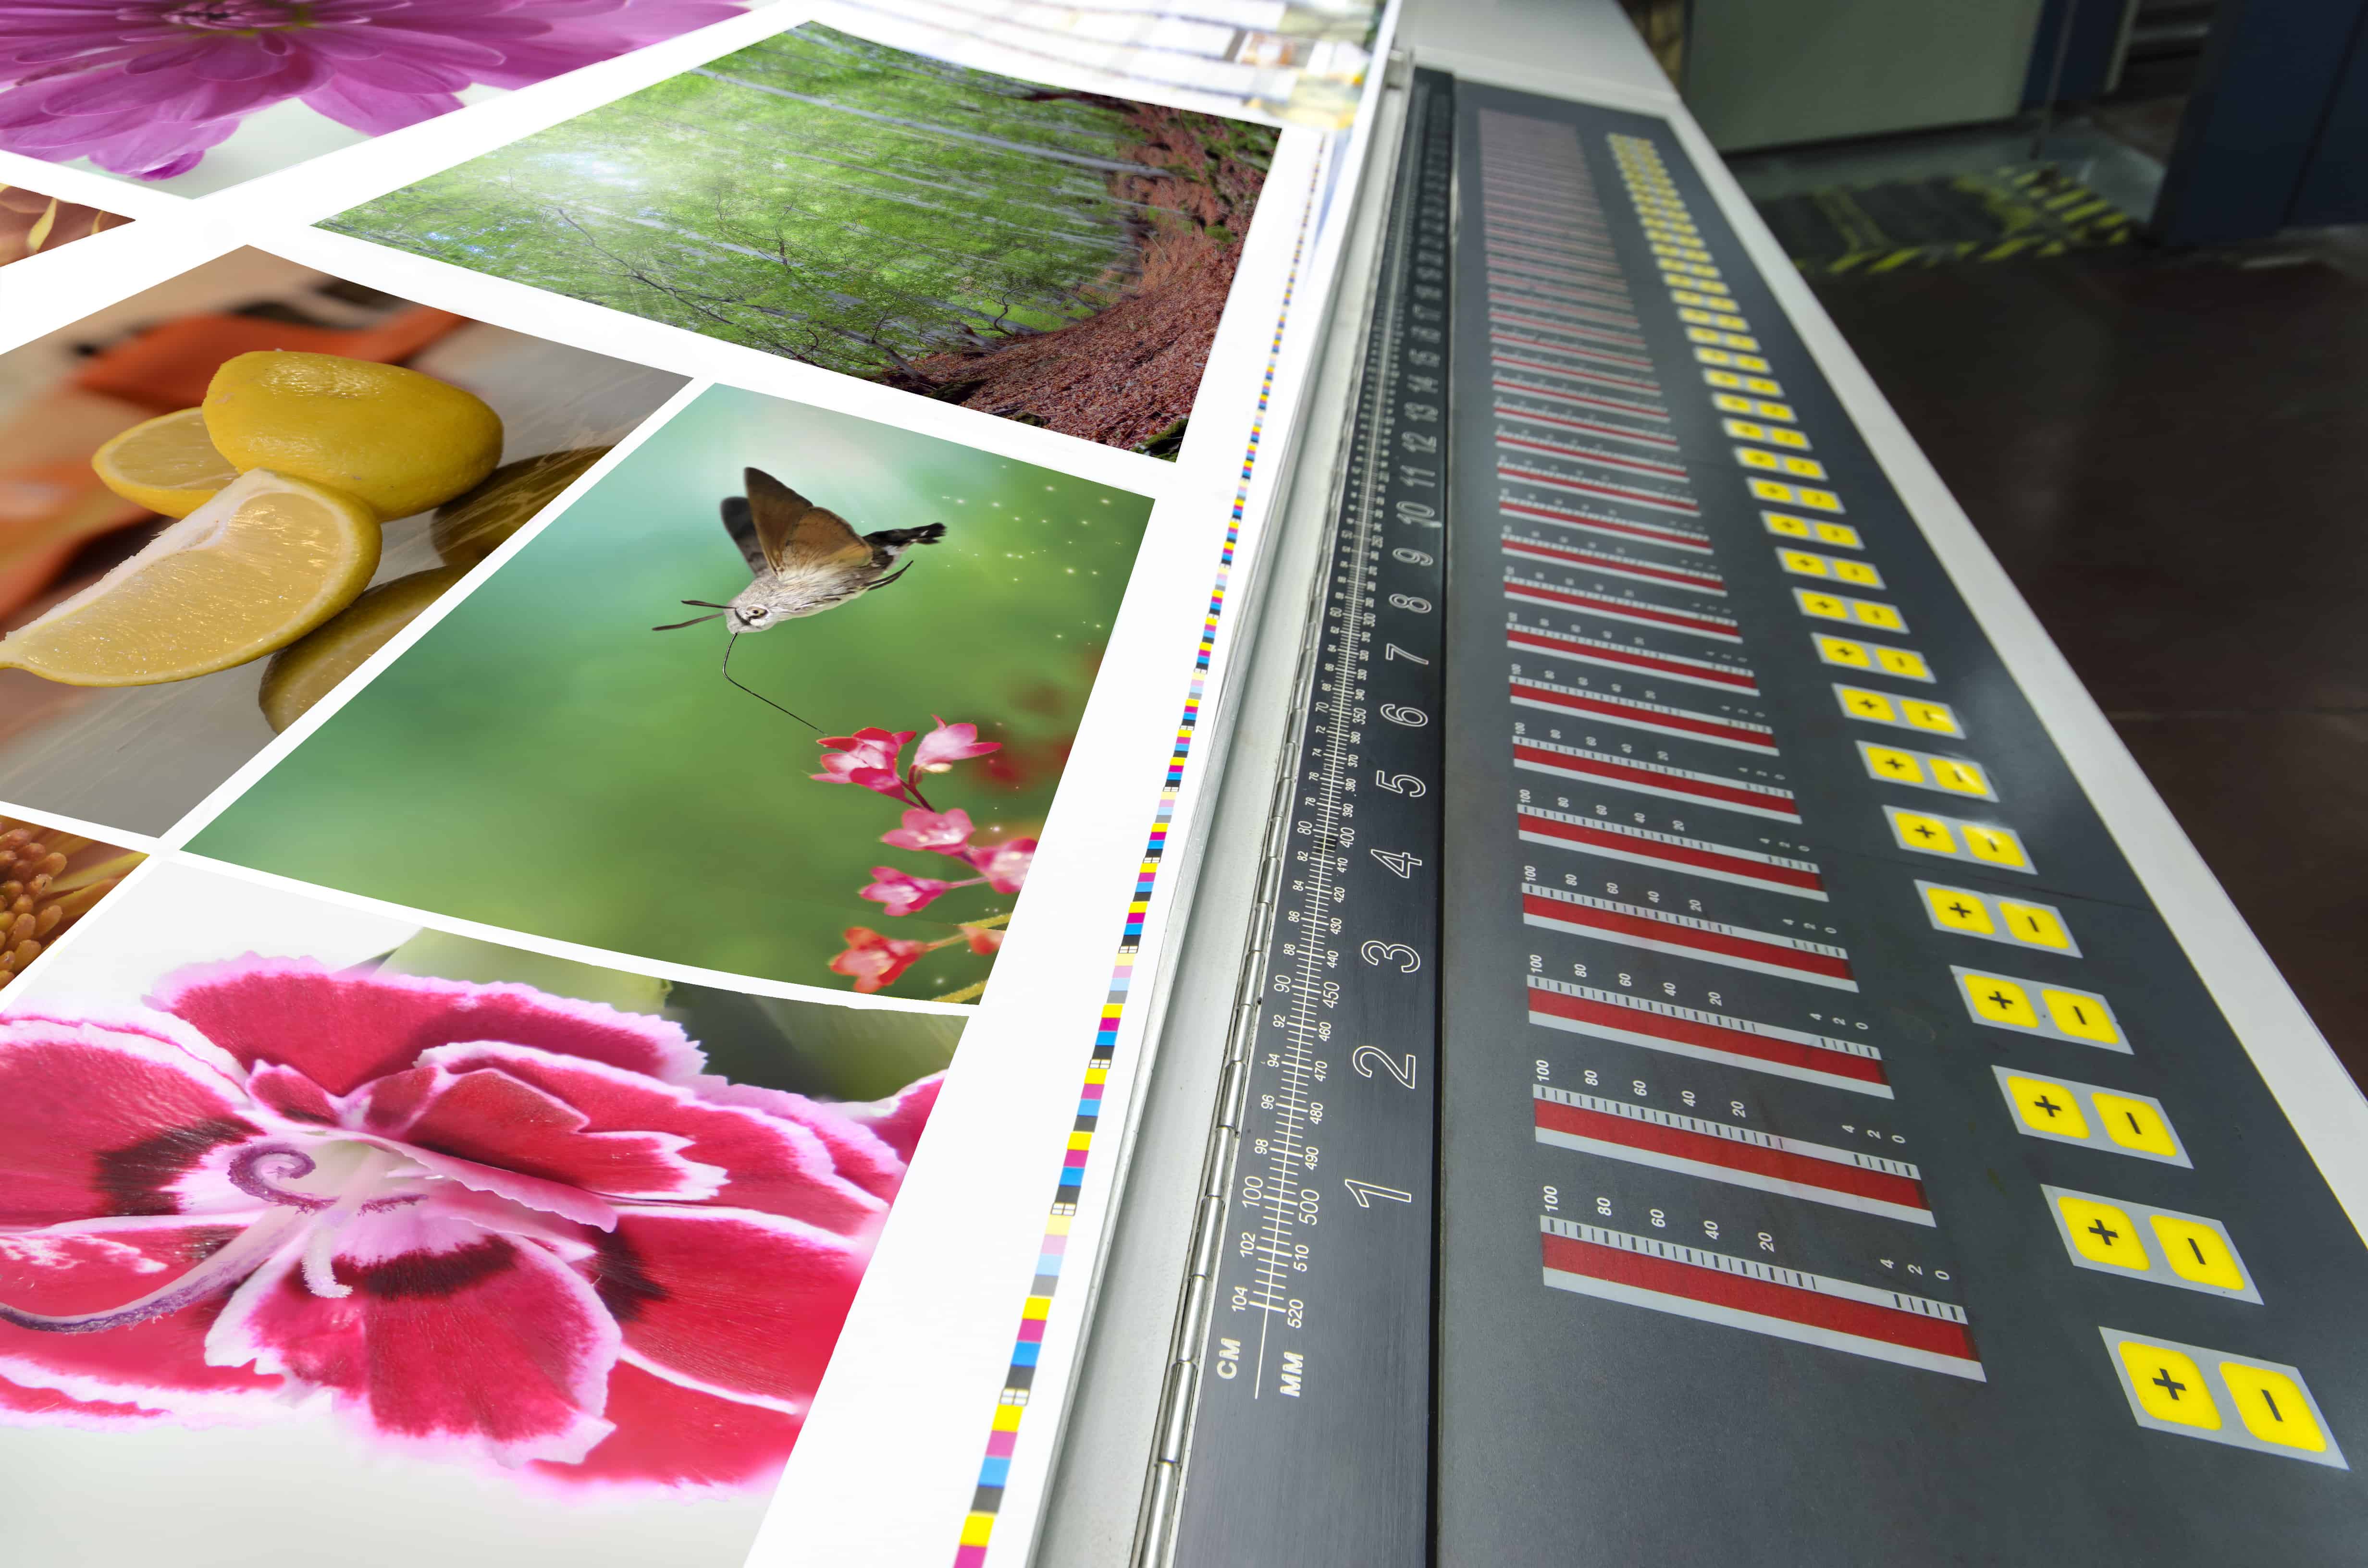
Understand RGB vs. CMYK

The colors you work with every day on your computer screen are set in RGB (red, green, blue) because they filter light coming out at you. The best way to produce color in print though is to use CMYK (cyan, magenta, yellow, black) because printed colors absorb light and reflect the colors back to your eye.
Therefore, most printers will need CMYK artwork to get the best color. However, if you’re going a small-batch job that will run through a color copier, some may prefer RGB. Some printers also prefer to receive files in RGB set to a specific profile so they can convert to CMYK themselves to ensure the files match the profile that works best on their equipment.
Dutch designer Damien van Holten offers a nice primer on RGB versus CMYK if you’d like to learn more.
Getting to CMYK
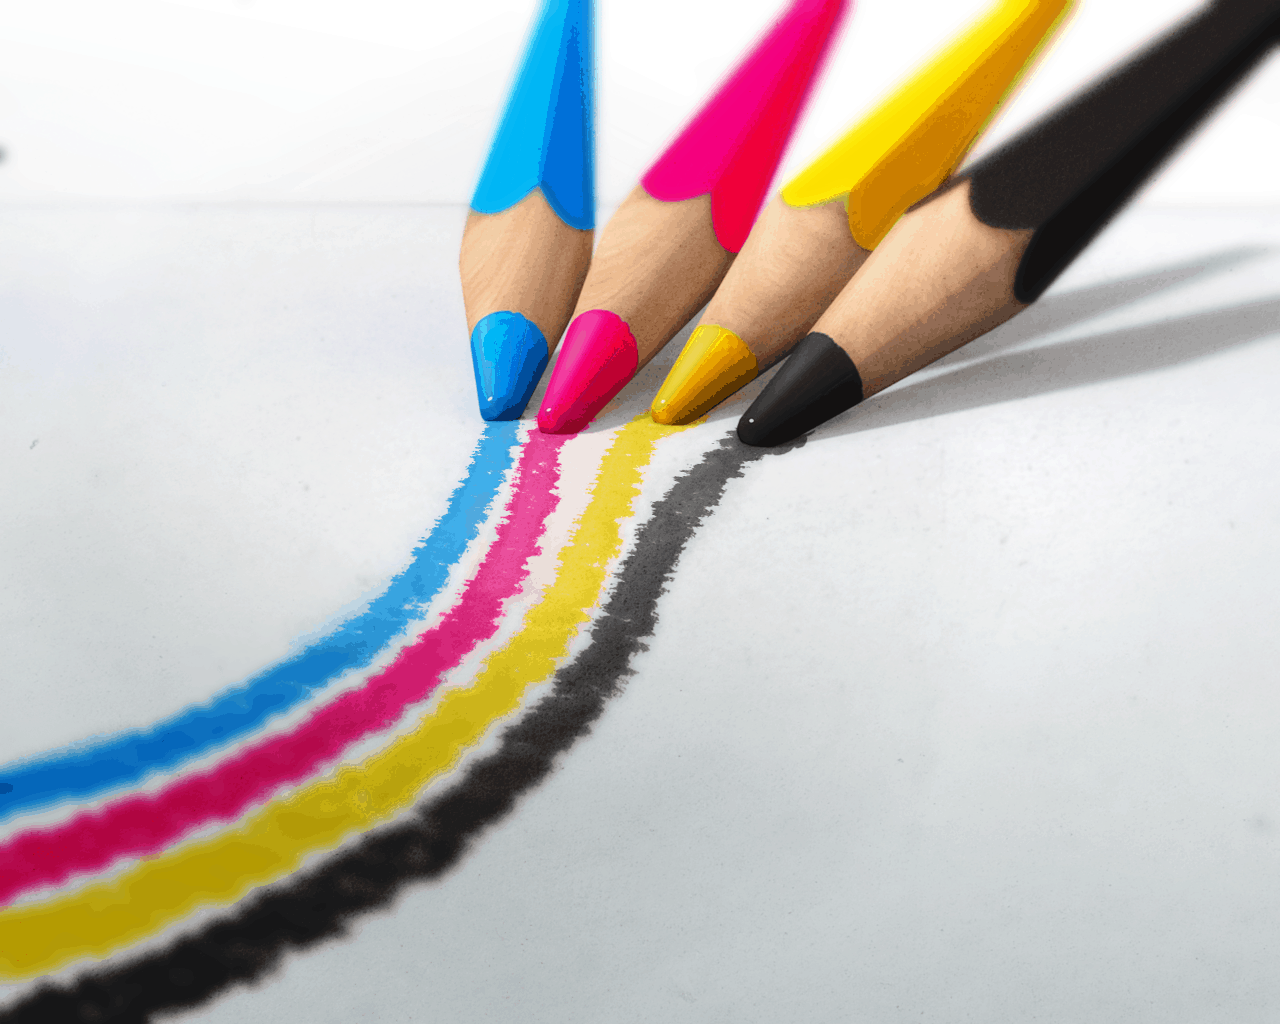
Digital images that come from your camera, phone, scanners or the web will be in RGB format. Spot colors also should be created in or converted to CMYK. Most photo editing software easily makes these conversions for you. Just be aware the images may look slightly different on your computer after you convert.
Find Your Best Black

If you’re going to have black text or black and white images in your poster, talk to your printer about the best option for getting a true black. Generally, you’ll want to avoid RGB black for printing, but since each poster will have different factors, your printer can give you the best advice on what black will blend best with the colors around it.
Right on Resolution
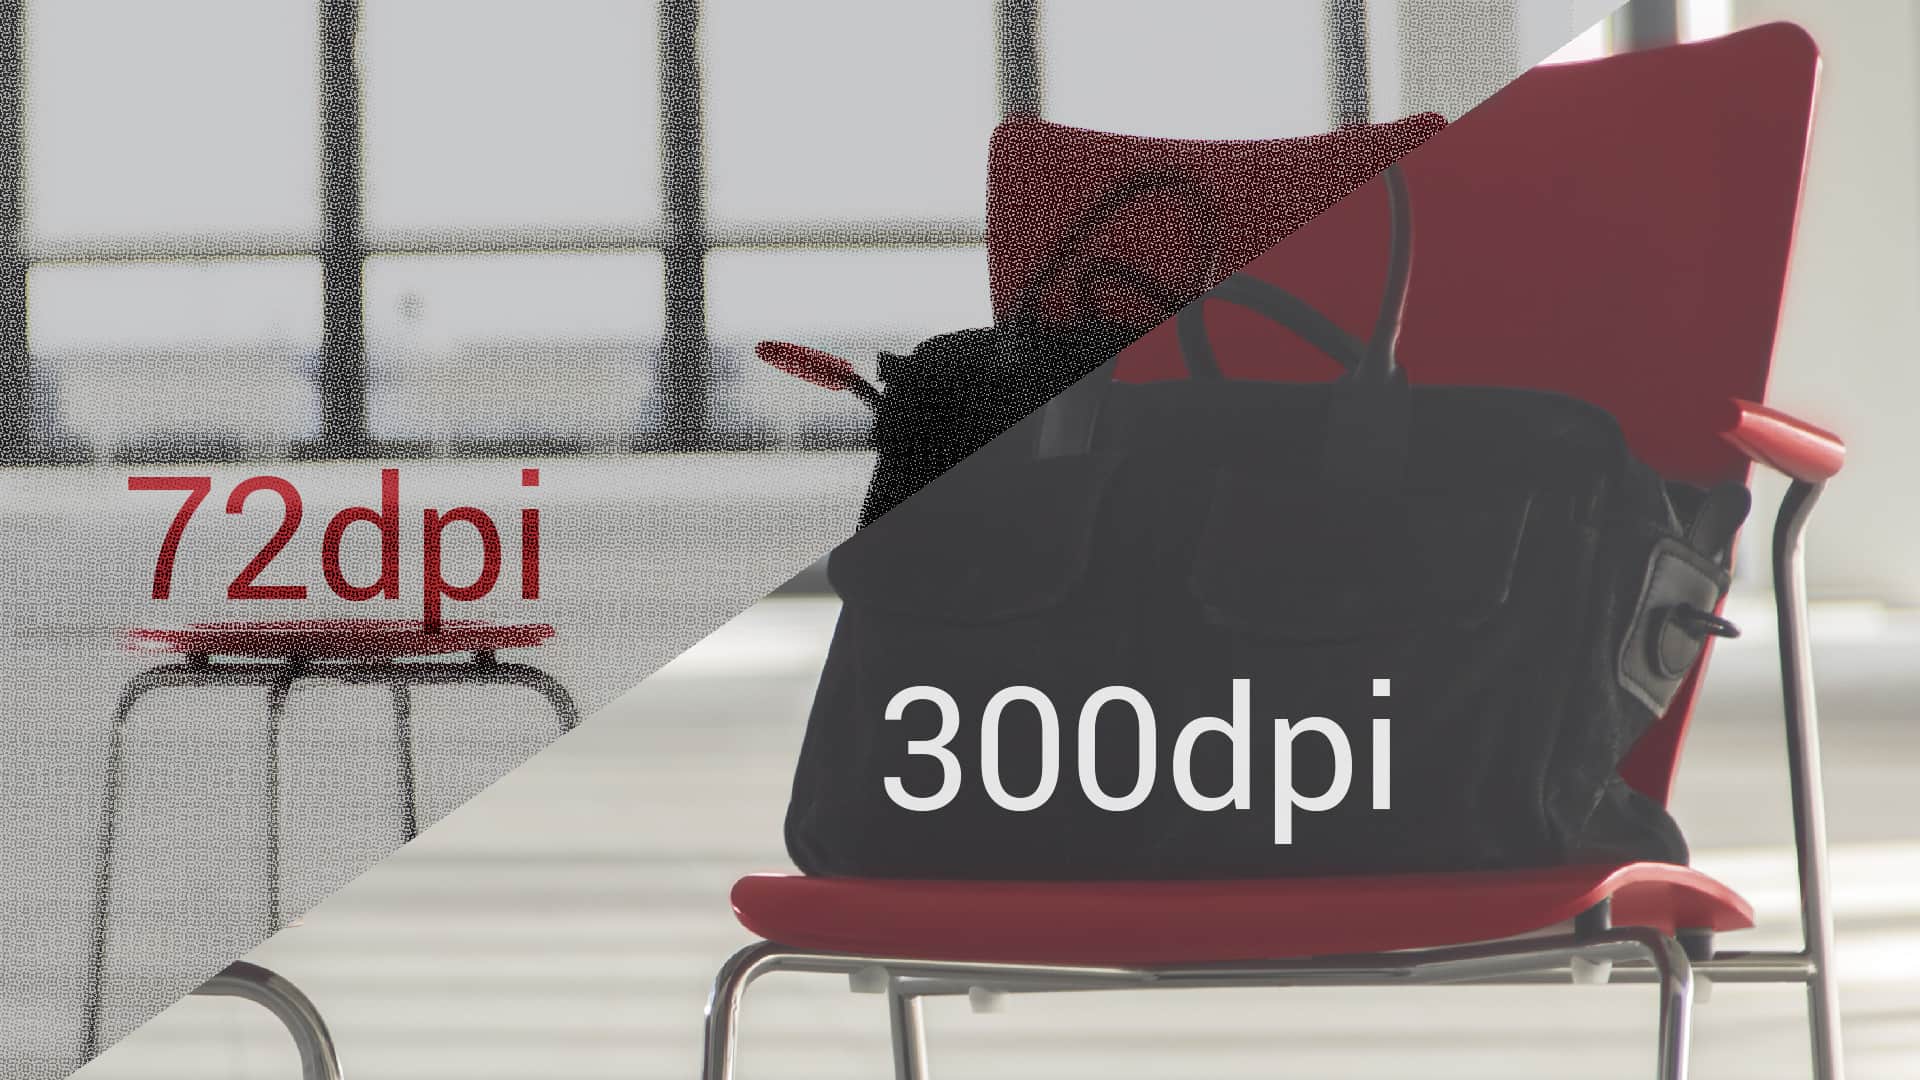
Most digital images you find on the web or that come from your camera are set at 72 dpi (dots per inch), which is the standard for viewing on a screen, but most poster printers will require 300 dpi. Bumping up the dpi on a smaller image won’t give you better printing results, so make sure you are using images that were large enough to begin with.
Sizing for Savings

Of course, you can make a poster any size you want (Printleaf prints large format posters up to 59 inches by 100 feet), but if you stick to a standard sizing, such as letter (81/2 by 11 inches), 9-by-12-inch (standard for photo framing) or tabloid (11 by 17), you’ll save a lot of money. You can see Printleaf’s standard poster sizes here.
To Bleed or Not to Bleed
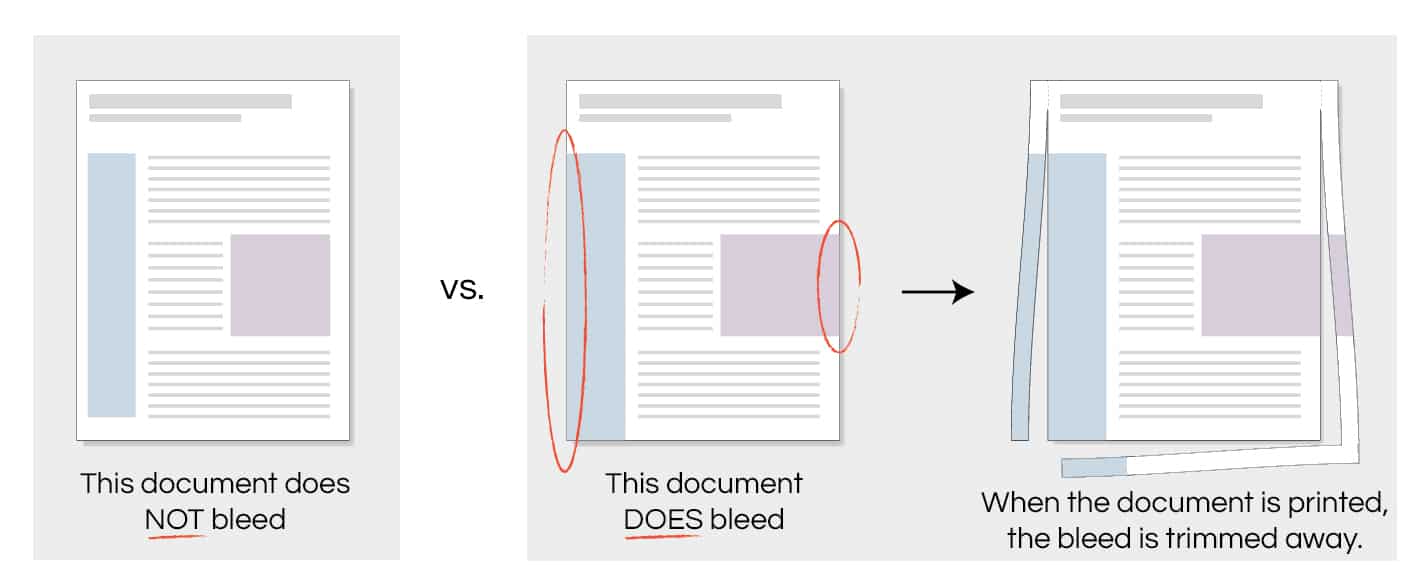
Also, if you want your poster to run to the edges (called a bleed), you need to give your printer a little wiggle room. Vital elements (such as letters or faces) should not be placed too close to the edge of your design (normally, 1/8th inch). Then give your printer an extra 1/8th inch on each side for trimming (i.e., design your 11 by 17 poster at 11.25 by 17.25 inches, with vital elements 1/4th inch from design edge).
Special Software?
The best software for you to design your poster is the software you are most comfortable using. Experienced graphic artists prefer to design in Adobe Illustrator so they can use vector graphics, which maintain their quality while scaling up and down. Photo editing software such as Photoshop also allows you to add type and other art elements. You also can used publishing software such as InDesign or Quark XPress.
Proof, Double Proof and Triple Proof
Always make sure your text is absolutely correct before sending your files to print. Don’t just rely on reading it on your computer. The brain works differently when you see the printed word, so check a proof copy. Also, get anyone else around the office or your home to read it for you. You know what you meant to say but you want to make sure you really said that. Showing it to someone else also ensures the fonts read the way you meant them to read. You don’t want “F’s” that look like “S’s” or “T’s” that look like “I’s”.
Outputting for Print
Once you’ve done all the strenuous work of designing your poster, you don’t want to mess things up at output time. Most printers will want to work with a press quality pdf, an eps or a tiff file with no compression. If creating a pdf in a publishing program, make sure you create in CMYK, as the default is RGB. You’ll see the difference immediately if you open the pdf.
Also, make sure your fonts are embedded in the file. Opening your final file on a different computer ensures you it still looks the same.
Choose an Experienced Printer
Finally, you want to make sure your printer has experience with the type of poster you dream of creating. Actually, choosing a printer shouldn’t be the final step as working with your printer through the design process helps ensure you don’t encounter the nightmare at the end of receiving posters that don’t reflect your vision.
Printleaf works with businesses large and small to meet all of their visual marketing needs and can ensure you get the posters you desire in the budget you’ve been given.
Last modified: January 31, 2020