Custom wall decals can turn an ordinary wall, storefront, or office into a high-impact brand experience. They help you create eye-catching environments without committing to permanent construction or expensive renovations. However, the final result depends on more than attractive artwork.
Material selection, surface condition, file preparation, placement, and timing all affect how your decal looks and performs. A small mistake can lead to bubbles, lifting edges, unreadable text, paint damage, or a missed opening-day deadline.
Below are seven common mistakes we see, and the practical fixes that help you avoid them.
1. Choosing the Wrong Material
The problem
Adhesive vinyl, removable vinyl, clear decals, and static cling are not interchangeable. Choosing based only on price or appearance can create problems later.
For example, a permanent adhesive may be appropriate for a long-term smooth-surface graphic but excessive for a seasonal retail promotion. Conversely, a static cling may not hold reliably on a dusty, textured, or porous wall.
Printleaf offers several material options for different applications:
- Adhesive-backed vinyl: Suitable for many wall, window, and smooth-surface graphics.
- Removable or repositionable options: Better for temporary campaigns, rentals, and seasonal messaging.
- Static cling: A practical option for clean glass and other smooth, non-porous surfaces.
- Clear window film: Useful when you want the glass or background to remain visible through unprinted areas.
Our custom wall decals are designed for decorative and branded wall applications, while window clings are listed with 7 mil white static cling and are removable and repositionable when properly installed. For permanent glass branding, window graphics provide another product option.
How to fix it
Start by answering three questions:
- Where will the graphic be installed? Painted wall, glass, metal, plastic, or another substrate?
- How long should it remain in place? A few weeks, several months, or multiple years?
- Will you need to remove or reposition it later?
For a permanent or long-term graphic, discuss adhesive strength, laminate, and expected exposure with your printer. For a temporary storefront promotion, ask specifically for a removable solution. If you are unsure whether a wall decal or window graphic is best, we can help match the substrate to your environment.

2. Ignoring Surface Preparation
The problem
Even high-quality vinyl will struggle on a dirty, damp, greasy, cold, or heavily textured surface. Dust and oils prevent the material from forming consistent contact. Moisture can cause lifting, while wall texture can create visible gaps beneath the decal.
Fresh paint also requires caution. Paint may feel dry but still be curing underneath. Applying a decal too soon can trap moisture, weaken adhesion, or pull paint away during removal.
How to fix it
Before installation:
- Confirm that the surface is smooth, dry, clean, and at room temperature.
- Remove dust and residue with water and a clean microfiber cloth.
- Use a mild soap solution if necessary, then rinse and allow the surface to dry fully.
- Avoid applying over peeling paint, chalky surfaces, heavy texture, or unsealed masonry.
- Allow freshly painted walls to cure completely. Depending on the paint and environment, this may take several weeks.
- Test a small piece in an inconspicuous area before installing a large graphic.
Do not assume that every “flat” wall is installation-ready. A quick site inspection can save you from reprinting an entire mural or repairing damaged paint. We can also discuss professional decal installation when the project is large, elevated, or time-sensitive.
3. Designing Without Measuring the Final Space
The problem
A decal can look perfectly proportioned on a laptop and still feel too small, too large, or poorly balanced on the actual wall. Product photos can also distort your expectations because perspective, furniture, and room scale vary from location to location.
Small text that looks readable on screen may be impossible to read from across a retail floor. A logo placed in the center of the artwork may be hidden behind shelving, a reception desk, or a display fixture.
How to fix it
Measure the usable area, not just the entire wall. Account for:
- Baseboards, trim, outlets, doors, and windows
- Shelving, counters, furniture, and merchandise
- Customer viewing distance
- Installation access and clearance
- The relationship between the decal and nearby signage
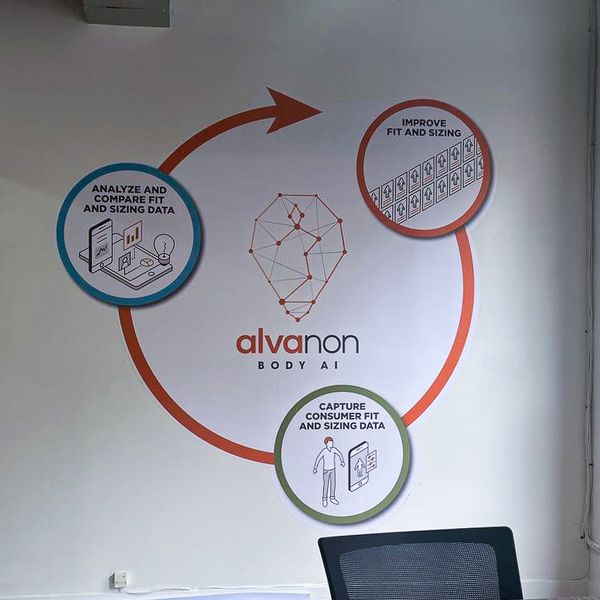
Create a simple mockup at the intended size. You can tape paper or low-tack masking material to the wall to evaluate scale before approving production.
For large graphics, prioritize visual hierarchy. Your logo, headline, or primary message should be visible first. Supporting details should remain secondary and readable only at a closer distance.
4. Treating Placement as an Afterthought
The problem
Even a well-designed decal can look unprofessional when it is installed too close to a corner, aligned to the wrong architectural feature, or placed where customers cannot see it.
Retail owners sometimes position graphics based on an empty wall before the store is fully merchandised. Interior designers may approve a location without considering changing light conditions or customer traffic patterns. In an office, a wall graphic behind furniture may become partially obscured.
How to fix it
Before finalizing placement, examine the space from the customer’s perspective:
- Where do people enter and pause?
- What direction do they naturally face?
- Is the graphic visible from the sidewalk or reception area?
- Will direct sunlight create glare?
- Does the design compete with nearby signs or products?
- Will doors, furniture, or future displays cover it?
Use painter’s tape to mark the top and side edges. Step back and view the proposed location from multiple angles. For window graphics, also consider sightlines, reflections, door hardware, and required visibility.
If the wall is not the best location, you may get stronger results from complementary banners, floor graphics, or window graphics.
5. Skipping Bleed and Safe Margins
The problem
Bleed is the extra artwork that extends beyond the final cut line. Without it, small cutting or trimming variations can expose an unintended white edge or unprinted strip.
Safe margins protect important content. If a logo, phone number, or headline sits too close to the edge, it may appear cramped or be affected by contour cutting.
How to fix it
Prepare your artwork at the final size and follow the printer’s template. As a general print-production guideline:
- Extend background colors and images at least 1/8 inch, or approximately 3 mm, beyond the cut line when bleed is required.
- Keep important text and logos several millimeters inside the finished edge.
- Make sure the design has strong contrast against both the printed background and the installation surface.
- Convert fonts to outlines or vector paths when possible.
- Use CMYK color planning for predictable print reproduction.
- Submit the final print file in PDF format.
A PDF helps preserve page dimensions, fonts, vector artwork, and layout information during prepress. If your decal includes a custom contour cut, clearly identify the cut path according to the printer’s specifications. We can review your file before production and flag issues before they become costly.
6. Failing to Plan for Removal
The problem
A seasonal campaign, leased office, pop-up shop, or retail refresh may require removal months later. If you select an aggressive adhesive without considering the wall condition, you could face adhesive residue, lifted paint, or extra labor.
Removal also becomes more difficult when decals are exposed to heat, sunlight, or prolonged use.
How to fix it
Tell your printer at the beginning if the graphic is temporary. Ask about removable adhesive, expected dwell time, and recommended removal practices.
When it is time to remove a decal:
- Warm a small section with a hairdryer on a low setting.
- Lift one corner gently.
- Peel slowly at a shallow angle, generally keeping the material close and parallel to the wall.
- Stop if paint begins to crack or lift.
- Remove any residue carefully with a product approved for that wall finish.
Never rip a decal away quickly. The condition of the paint, the age of the wall, and the adhesive type all affect the result. No removable material can guarantee zero wall impact on every surface, so testing is important.
For glass promotions that need frequent changes, window clings may provide more flexibility than permanent adhesive graphics. For longer-term storefront campaigns, consider custom window graphics.
7. Underestimating Turnaround Time
The problem
The production clock does not always start when you first request a quote. Design revisions, file corrections, proof approval, contour cutting, installation scheduling, shipping, and building access can all add time.
Waiting until the day before a store opening or event can force compromises in artwork and material selection.
How to fix it
Build a realistic schedule that includes:
- Initial measurements and design
- File preparation and PDF submission
- Proof review and approval
- Production
- Shipping or local pickup
- Installation and inspection
- A contingency period for unexpected issues
Printleaf offers rush and same-day capabilities on select products, but availability depends on size, quantity, material, artwork readiness, and order cutoff times. Confirm the current production estimate before making a deadline promise.
If your wall graphic is part of a larger brand environment, coordinate all components at once.
You may need tension fabric displays, table cloths, or retractable banners for a retail launch, trade show, or corporate event. Coordinating production helps maintain consistent color, messaging, and perceived value across the entire space.
Wall Decal FAQ
Are wall decals suitable for every wall?
No. Smooth, clean, fully cured surfaces are generally the best candidates. Heavy texture, peeling paint, damp areas, and porous substrates can prevent proper adhesion.
Should you choose a wall decal or window cling?
Choose a wall decal when you need an adhesive-backed graphic for a suitable wall or smooth surface. Choose a window cling when removability and repositioning are priorities, particularly on clean glass.
What file format should you submit?
Submit your final print file in PDF format. At final size, artwork should be sharp, correctly scaled, and prepared with appropriate bleed and safe margins.
Can Printleaf help with large wall graphics?
Yes. Our large format printing nyc services support retail graphics, wall wraps, window graphics, posters, banners, and other high-visibility applications. We can also help review artwork, discuss materials, and coordinate installation.
Make Your Next Decal Project Easier
Custom wall decals can create a lasting impression when the material, artwork, surface, and schedule are planned together.
Avoiding these seven mistakes protects your budget and helps your finished graphic look intentional, polished, and professional.
Share your wall dimensions, surface type, installation location, and deadline with our team. We will help you choose a practical solution and move your project from concept to installation with fewer surprises.
Last modified: August 11, 2026
